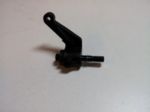
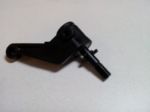
While Pro-Line Racing has a long heritage of making some of the best tires in the world, they’ve also been making top-tier accessories in recent years. One of the coolest option kits they have is designed for the Losi® XXX-SCT and XXX-SCB platforms. The Pro-Line Racing Inboard Front Hub Kit is designed to make it possible to run front wheels that utilize a hex mounting option, similar to the TEN-SCTE. In fact, once this modification has been installed, you can run the exact same wheels on the front of your XXX-SCB or XXX-SCT chassis, allowing you to share wheels and tires between both chassis platforms if they both happen to be in your garage.
Speed Specs:
Manufacturer: Pro-Line Racing
Part: Losi XXX-SCT/SCB Front Inboard Hub
Part Number: 6069-00
Compatible Chassis: XXX-SCB, XXX-SCT
Installation Time: >30 minutes
What’s Included:
The kit from Pro-Line Racing is really complete and should feel familiar to anyone who has worked on the front end of their XXX-SCT or XXX-SCB in the past. The kit includes a new set of left and right steering knuckles and uprights, new axles, 4-ball bearings, 2 long and 2 short bushings for the kingpin screws to rotate on and some very nice aluminum wheel hexes. Of course, other miscellaneous hardware and parts are included to help you complete the installation. You will need to recycle a few odds and ends parts from your truck, such as the upper camber link or ball stud, steering ball stud and lower hinge pin.
Initial Assembly
Before you can assemble the components, you need to remove them from the parts tree to which they are molded. Using some sort of side or nippy cutters will make it easier to remove the individual parts from the tree. Even then, however, you should also use a hobby knife to remove any excess flashing you may have left over. Once the parts have been removed from the parts tree and you’ve cleaned up the flashing, you can start the assembly process.
The first step in the actual assembly process is to install the ball bearings into the steering knuckles. Be careful here as there are also two very thin shims packaged with the kit; one of mine was stuck to the bearing in the package. Once the bearings were installed, I noticed they weren’t aligned very well. I used the included axle to help align everything by installing the nut on the end of the axle. From here I pulled on both sides of the axle, which also pulled the bearings into place and properly seated them.
Now it’s time to install the axle, cross pin and wheel hex into the steering knuckle. As I mentioned above, you’ll want to ensure the axle rotates freely and there aren’t any signs of binding. Once the axle has been run through the bearings, you will need to install the thin shim onto the axle.
Now you’re ready to install the cross pin through the hole on the axle. Unlike other cross pins, those included with this kit slide into place rather nicely, eliminating the need to pinch one of the ends to make installation easier.
You’re just about ready to install the wheel hex onto the axle. Before you do, you’ll need to install the .050? setscrew into the hex. I highly recommend using some sort of thread locking compound (not included) on this screw to prevent it from backing out. As I normally do, I used Losi Losi-Lok™ blue threadlock.
We’re getting closer here! You’ll need to install the two bushings into each C-Hub, noting the different lengths of each one. The longer bushing will be installed in the upper part of the C-Hub, with the shorter bushing installed in the lower part.
This is perhaps the most important step in the installation process. You need to double and triple check the alignment of the kingpin screws as you begin to thread them into the steering knuckles themselves. If you don’t have them straight, you will induce binding as the knuckle rotates.
It may take a few tries to get right, but the extra time you spend here will prevent quite a few headaches down the road. Now with the knuckles properly assembled, we’re ready to finish the installation and bolt them on to the front end of our truck.
Chassis Installation
We’re ready to start pulling parts off of our XXX-SCT. My truck is a little different than a stock truck, as I have installed Losi Titanium Ball Studs, Super Duty Ball Cups and Ti-Nitride Hinge Pins.
To begin the disassembly of the stock components, I first removed the e-clip that retains the outboard hinge pin. Make sure you keep track of this e-clip, as you’ll need to re-use it later. I used a 3/32? Allen wrench to push the hinge pin out from the A-Arm.
Once the hinge pin is removed, you’ll need to pop off the ball cups for both the steering and camber links. Grab a hold of your cup with needle-nose pliers and rotate the cup until it pops free. You never want to pull the cup straight off, as you may risk breaking something.
Now that the stock parts have been removed from the suspension, we’ll need to pull a few components off of it and transfer it to the new parts. You need to transfer the camber ball stud and the steering ball stud at this time. Install your parts onto the Pro-Line knuckle and upright. The Pro-Line parts mimic the mounting locations of the stock parts, so make sure you install any shims or spacers you may have had originally installed.
We’re almost done. Install the new Pro-Line components onto your truck using the outward-most mounting point of the VLA suspension on your truck. Re-install the e-clip on the other side of your hinge pin and pop the ball cups back into place.
There’s one last step in order to be able to use the wheels for the TEN-SCTE on all four corners of your truck. Swap out the stock molded rear wheel hexes for Losi XXX-SCT/TEN-SCTE Wheel Hex Adapters and you’ve completed your conversion.
Hits:
-Allows you to quickly and easily use the same wheels and tires on allfour corners of your XXX-SCT or XXX-SCB
-Inexpensive
-Maintains ROAR legality
-Accurately replicates stock geometry and mounting location.
Conclusion:
Before the XXX-SCT was released, my personal race short course truck was an HPI Blitz. One of the things I’ve missed since making this move has been the ability to use one wheel regardless if it was getting mounted on the front or rear end. The Pro-Line kit allows me to do this while maintaining the stock geometry. I wish the Pro-Line parts had a little less flex, but thus far it doesn’t seem like this has affected my truck’s handling. In-fact I used this kit on both my XXX-SCT and XXX-SCB at the 2012 Short Course Nationals and TQed the Short Course Buggy class and qualified second in 17.5T SCT. This is an exceptional kit that makes life much easier, especially if you have a TEN-SCTE as you can share the same wheels and tires between vehicles once this conversion is installed with the Losi rear wheel hexes.
Source: HorizonHobby.com


